Walk into any gym and you’ll see two distinct worlds: the free weight section with its barbells, dumbbells, and benches, and the machine area with its guided tracks, cables, and weight stacks. If you’re new to training, it’s natural to wonder which one you should be using — and whether you’re missing out by gravitating toward one over the other.
The honest answer is that both have a place in a well-designed program. But understanding the difference between them will help you make smarter decisions about when to use each one.
Free Weights: More Muscle, More Skill Required
Free weights — barbells, dumbbells, kettlebells — are exactly what the name suggests: free to move in any direction and along any path. That freedom is both their greatest strength and their biggest challenge.
The Benefits of Free Weights
Because the weight isn’t guided by a track or restricted to a single plane of motion, your body has to control it entirely on its own. This recruits your stabilizer muscles — the smaller supporting muscles around your joints that don’t get much work on machines — and develops coordination and balance that carries over directly to athletic performance and everyday movement.
For anyone following a strength training program with long-term goals, free weights are typically the foundation. The five foundational movements — bench press, bent over row, squat, deadlift, and lunge — are all free weight movements for this exact reason.
The Risks of Free Weights
With freedom comes responsibility. Because nothing is guiding the weight for you, proper form and technique matter enormously. If you don’t know how to engage your core, which plane of motion to move in, or how to position your joints correctly under load, the risk of injury is meaningfully higher than it would be on a machine.
This is why learning the foundational movements with lighter weight before progressing is so important — a point we covered in detail in Episode 4 on how much weight to lift. The technique has to come before the load.
Machines: Safer by Design, but with Trade-offs
Machines restrict your movement to a fixed plane of motion — the track, cable, or guided bar determines exactly how the weight moves. That constraint changes the training experience in a few important ways.
The Benefits of Machines
Because the machine controls the path of the weight, you can typically lift heavier loads more safely than you could with free weights. There’s less demand on your coordination and stabilizer muscles, which means more of your effort goes directly into the target muscle group. For isolating a specific muscle — like a leg extension for the quads or a cable fly for the chest — machines are often more effective than free weights.
Machines are also significantly safer for solo training. Many come with built-in safety mechanisms — adjustable stops, locking pins, guided racks — that protect you if you reach failure mid-set. This makes them a strong choice when you’re training alone and don’t have a spotter.
The Limitations of Machines
The same restriction that makes machines safer also limits their training benefit. Because your stabilizer muscles don’t need to engage to control the movement, you’re getting less total muscle recruitment than you would with a comparable free weight exercise. Over time, a program built exclusively on machines can create imbalances — strong primary movers, underdeveloped stabilizers — that show up as weakness or injury risk when you move outside the gym.
When It Makes Sense to Use Both
The most practical approach for most people isn’t choosing one or the other — it’s knowing when each tool is the right one for the job.
The Smith Machine Example
A good example is the chest press. If you’re training alone, lifting heavy, and don’t have a spotter, a barbell bench press carries real risk — if you reach failure, you’re stuck under the bar. In this situation, a Smith machine is a smart alternative. The bar is locked onto a guided track, and you can twist it to rack it at any point in the movement. Many Smith machines also have adjustable safety catches on the sides as a secondary backup.
You’re giving up some stabilizer recruitment compared to a free barbell, but you’re training safely — and a safe training session is always better than an unsafe one.
Building a Balanced Routine
A well-structured program typically uses free weights for the foundational compound movements — where full-body coordination and stabilizer recruitment matter most — and incorporates machines for accessory work, isolation exercises, or situations where safety is a higher priority than movement freedom.
This is the approach built into the Ultimate Guide to Resistance Training and most evidence-based strength programs. Understanding progressive overload applies to both tools equally — the goal is always to progressively challenge the muscle, regardless of the equipment you’re using to do it.
One of the first questions every new lifter asks is also one of the most important: how much weight should I actually be lifting? Go too heavy too soon and you risk injury, excessive soreness, and burnout. Go too light and you might feel like you’re not making progress. The good news is there’s a simple, reliable system for finding your starting weight and knowing exactly when to increase it — and it doesn’t require guesswork.
Start Lighter Than You Think
When you’re new to resistance training, the instinct is often to test yourself — to find out what you’re capable of. Resist that instinct, at least in the first week or two.
The guidance here is straightforward: pick a weight that feels genuinely easy. Don’t push yourself. There’s no benefit to maxing out your effort in your first sessions, and there’s real downside risk if you do. The first couple of weeks in the gym aren’t about performance — they’re about getting your body accustomed to the movements and the load.
This matters more than most beginners realize because what you’re capable of lifting and what you’re capable of recovering from are two very different things. You might be able to grind out a set at a certain weight, but if your body can’t recover from it efficiently, that weight is too heavy for where you are right now — regardless of how it felt in the moment.
Use Recovery as Your First Feedback Mechanism
Some muscle soreness in your first two weeks is completely normal. Your body is adapting to a new stimulus and that process comes with discomfort. What you’re watching for is how long that soreness lasts.
The 3-Day Recovery Rule
If you’re still sore more than 3 days after a workout, that’s a signal — even if you chose a lighter weight, it was still more than your body was ready to recover from consistently. Back off slightly and give yourself more runway before progressing.
If your soreness clears within 3 days, you’re in a good spot. Your body is handling the load and recovering on schedule. That’s the green light to stay at that weight and start building consistency before thinking about going heavier.
Recovery is your first and most important feedback mechanism. No program, no app, and no trainer can tell you more accurately whether a weight is right for you than your own body’s recovery response.
Once you’ve found a weight you can recover from in under 3 days, the next question is: when do you go heavier? This is where the Two Rep Rule comes in — a simple, practical method for knowing when your body is ready for the next level.
How the Two Rep Rule Works
Let’s say your program calls for 3 sets of 10 reps on an exercise. Here’s how to apply the rule:
You’re ready to go heavier if: You come into your next session and hit 12 reps instead of 10. Getting 2 more reps than your target tells you the weight has become manageable enough that it’s time to test something slightly heavier at your next workout.
You’re right where you need to be if: You hit 8 reps instead of 10. That’s within 2 reps of your target, which means the weight is still appropriately challenging. Keep working at it and focus on getting back to the full 10.
The weight is still too heavy if: You’re falling significantly below your rep target — getting only 6 or 7 reps on your first set. That’s a sign you moved up too quickly. Step back to the previous weight and rebuild from there.
Why This System Works
The Two Rep Rule works because it takes the guesswork and ego out of progression. Instead of increasing weight on an arbitrary schedule — every week, every month — you let your performance tell you when you’re ready. This is the practical application of progressive overload: adding load only when your body has demonstrated it’s adapted to the current demand.
It also protects you from one of the most common beginner mistakes: increasing weight too fast, hitting a wall, losing confidence, and either regressing or quitting. Slow, consistent progression beats aggressive jumps every time.
Putting Both Feedback Mechanisms Together
You now have two reliable tools for managing your training load:
Recovery tells you whether the weight you chose was appropriate after the fact. If you’re sore for more than 3 days, back off. If you recover within 3 days, you’re in the right zone.
The Two Rep Rule tells you in real time whether you’re ready to progress. Hit 2 more reps than your target and it’s time to test a heavier weight. Fall more than 2 reps short and stay where you are.
Used together, these two mechanisms give you everything you need to progress safely and consistently — without a trainer standing over you calling out numbers. They put the feedback loop in your hands, which is exactly where it should be.
This is the foundation of smart, sustainable strength training. And as the Ultimate Guide to Resistance Training makes clear, the lifters who make the best long-term progress aren’t the ones who push hardest — they’re the ones who progress most intelligently.
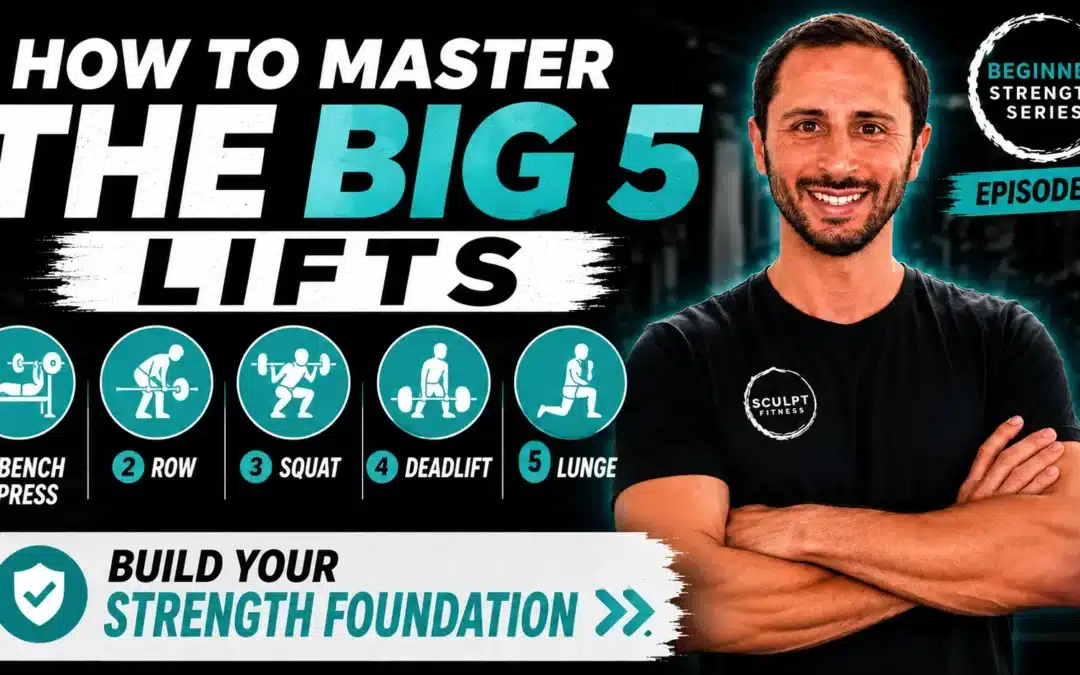
Every strength training program, regardless of your goal or experience level, is built around a core set of movements. Master these and you have the foundation for virtually any program you’ll ever follow. Skip them — or perform them with poor technique — and you’re leaving results on the table while increasing your injury risk.
In this episode, we cover the five foundational movements of strength training: the chest press, back row, squat, deadlift, and lunge. For each one, we’ll walk through exactly how to execute the movement and flag the most common mistakes so you can train safely and effectively from day one.
The 5 Foundational Strength Training Movements
Before diving in, it’s worth understanding why these five movements are considered foundational. Together they cover every major muscle group and movement pattern the body performs — pushing, pulling, hinging, squatting, and single-leg work. A program built around these five is a complete program.
1. The Barbell Bench Press (Chest Press)
The bench press is the primary upper body pushing movement in most strength programs. Done correctly, it develops the chest, shoulders, and triceps while building the kind of pressing strength that carries over to dozens of other exercises.
How to Perform the Barbell Bench Press
Set the bench flat and lie back with a slight arch in your lower back — enough to slide a hand underneath. This isn’t excessive arching; it’s a natural spinal position that protects the lower back and creates a stable pressing platform.
Squeeze your shoulder blades together and drive them into the bench. This creates the firm, stable upper back you need to press from.
Grip the bar near the ring markings, with feet flat and wide on the floor for a stable base.
Unrack the bar and lower it to the bottom of your sternum — not your upper chest, not your neck.
Press the bar up and slightly back so that at the top of the movement, it finishes above your shoulders, not directly above your chest. Think of your elbows moving toward your face as you press.
Lower under control back to the sternum and repeat.
Common Mistakes to Avoid
Going straight up and down. The bar path on a bench press is not vertical — it follows a slight arc, finishing over the shoulders at the top. Pressing straight up puts unnecessary stress on the shoulder joint.
Loose shoulder blades. If your upper back isn’t tight and your shoulder blades aren’t retracted, you lose your pressing platform and put the shoulder in a vulnerable position.
2. The Barbell Bent Over Row (Back Row)
The bent over row is the primary upper body pulling movement — the counterpart to the bench press. It targets the lats, rhomboids, rear delts, and biceps, and is essential for building a strong, balanced upper body.
How to Perform the Barbell Bent Over Row
Approach the bar and grip it near the ring markings, hands slightly wider than shoulder width.
With feet hip to shoulder width apart and a tight core, lift the bar off the rack and step back.
Push your hips back and lower the bar into a deadlift-like position — bar just below the knees, back flat, chest up.
Pull the bar into your belly button, not straight up toward your chest. Your elbows drive back and your lats do the work.
Lower the bar back down below shoulder height under control and repeat.
Keep your core braced throughout the entire set.
Common Mistakes to Avoid
Pulling straight up. The bar travels back toward the body, not straight up. Pulling vertically turns this into a shrug and takes the lats out of the movement.
Losing core tension. A loose core during the bent over row puts the lower back in a compromised position under load. Brace before every rep.
3. The Barbell Back Squat
The squat is the king of lower body movements — and one of the most important exercises in any strength training program. It trains the quads, hamstrings, glutes, and core simultaneously, and the strength it builds transfers directly to athletic performance and everyday movement.
How to Perform the Barbell Back Squat
Set the bar height just below shoulder height on the rack.
Step under the bar and place it on your upper back — not your neck. Your traps should support the bar, not your cervical spine.
Grip near the ring markings, unrack the bar by pressing up, and step back into your squat stance.
Keep chest up, shoulders back, core tight throughout the movement.
Initiate the squat by pushing the hips back first, then lower down until your hips reach 90 degrees — parallel to the ground.
Drive through your feet to press back up to standing.
Step forward back into the rack, press the bar against it, and rerack safely.
Common Mistakes to Avoid
Letting the chest fall forward. If your torso drops as you descend, the load shifts to your lower back. Keep your chest tall the entire way down.
Not reaching depth. Stopping short of parallel limits the range of motion and reduces the training stimulus on the quads and glutes. Aim for hips parallel to the ground on every rep.
4. The Barbell Deadlift
The deadlift is arguably the most complete strength movement there is — it trains the posterior chain (hamstrings, glutes, lower back, and traps) while requiring full-body tension from the floor to lockout. It’s also one of the most commonly performed incorrectly. Understanding progressive overload with the deadlift is key to long-term strength gains.
How to Perform the Barbell Deadlift
Set the bar at a height just below where your hands reach when standing.
Push your hips back and grip the bar just inside the ring markings.
Lift the bar off the rack and step back to your starting position.
To begin each rep, push your hips back, keep your chest up, and let the bar travel down the front of your legs — it should stay close to your shins the entire way.
Lower until the bar reaches just below the midpoint of your shins, then drive your hips forward to pull the weight back up, locking out at the top.
For increased hamstring engagement: at the top of the movement, don’t fully lock out your hips. Keeping them slightly back maintains tension on the hamstrings throughout the set — this is the principle of Time Under Tension (TUT) applied directly to the deadlift.
Common Mistakes to Avoid
Letting the bar drift away from the body. The bar should ride close to your legs throughout the movement. The farther it drifts forward, the more stress it places on your lower back.
Rounding the lower back. Always initiate with hips back and chest up. A rounded lower back under heavy load is the most common cause of deadlift-related injury.
5. The Barbell Reverse Lunge
The lunge is the single-leg movement of the foundational five — and the reverse lunge variation is the safest and most controlled way to perform it. It trains the quads, glutes, and hamstrings unilaterally, meaning each leg works independently. This is critical for identifying and correcting strength imbalances between sides.
How to Perform the Barbell Reverse Lunge
Set the bar just below shoulder height on the rack.
Step under the bar and place it on your upper back, just as you would for a squat.
Unrack and step away from the rack.
Step one foot straight back, letting the back knee lower until it almost touches the ground.
Your goal: back knee below your hip at the bottom of the movement. Not too far back, not too close — find the stride length where your front shin stays relatively vertical.
Press through your front foot to stand back up, bringing your feet together.
Alternate legs or complete all reps on one side before switching.
To rerack: step back into the rack, press the bar against it, and lower it down safely.
Common Mistakes to Avoid
Stepping too far or too close. Too far back and you lose stability; too close and your front knee caves forward past your toes. Find the stride length that keeps your torso upright and your front shin vertical.
Dropping the chest. Just like the squat, keep your chest tall and your core braced throughout every rep. Letting the torso lean forward shifts load away from the legs and onto the lower back.
Putting It All Together
These five movements — bench press, bent over row, squat, deadlift, and reverse lunge — cover every major muscle group and movement pattern your body needs to develop. Together they form the backbone of the Ultimate Guide to Resistance Training and virtually every well-designed strength program you’ll ever encounter.
The goal isn’t to perfect all five movements on day one. It’s to understand what correct form looks like, know the mistakes to watch for, and build the habit of executing each rep with intention. That’s what separates lifters who make consistent progress from those who spin their wheels.
In the next episode, we’ll continue building on this foundation as the series progresses.
Every training program — whether you’re a beginner picking up weights for the first time or an experienced lifter chasing new PRs — is built on the same four variables: reps, sets, rest, and intensity. These aren’t arbitrary numbers your trainer pulled out of thin air. Each one has a specific purpose, and understanding what they mean is the difference between following a program blindly and training with real intention.
Let’s break down each one.
What Are Reps — and How Many Should You Do?
A rep (repetition) is a single complete movement of an exercise — one squat, one push-up, one bicep curl. The number of reps you perform in a given exercise is one of the primary ways your program communicates what training outcome it’s targeting.
Reps for Strength
If your goal is to build raw strength, your rep range will typically be lower — think 1 to 5 reps per set. The focus here is on moving as much weight as possible. Fewer reps means heavier loads, which trains your nervous system to recruit more muscle fibers at once and builds the kind of strength that translates to real-world power.
Reps for Muscle Growth (Hypertrophy)
Building muscle is a bit more flexible. Rep ranges for hypertrophy can span from as low as 5 all the way up to 20 or more, depending on where you are in your training and what your program is designed to do. What matters most is that you’re bringing the muscle close to fatigue within that range.
Reps for Muscular Endurance
If you’re training to sustain effort over longer periods — think long-distance athletes, cyclists, or anyone whose sport demands repeated efforts — higher rep ranges of 15 to 20+ are common. You’re not moving maximum weight; you’re training the muscle to keep working without giving out. For a deeper look at how these goals differ, see Muscular Endurance vs. Hypertrophy: Making the Switch.
What Are Sets — and How Many Do You Need?
A set is a group of consecutive reps performed without stopping. If you do 10 squats, rest, then do 10 more, that’s 2 sets of 10 reps.
The number of sets in your program determines your total training volume for a given muscle group — and volume is one of the primary drivers of muscle growth and strength adaptation.
More Sets = More Volume
If your program calls for 4 sets of an exercise, it’s because your body needs a higher training load to continue making progress. This is typically the case for more experienced lifters whose muscles have already adapted to lower volumes and need a greater stimulus to keep growing.
If you’re seeing 2 sets, it’s likely because you’re earlier in your training journey, or because that particular muscle group doesn’t need as much work relative to others in your program.
“The number of sets in your program determines how much volume you’re placing on a muscle to drive progress.”
The concept of progressively increasing volume over time is called progressive overload — one of the most important principles in all of strength training. You can read more about it in our detailed guide on progressive overload in strength training.
And if you’ve ever wondered whether spending more time in the gym automatically means better results, the answer might surprise you — check out Does More Time in the Gym Mean Better Results?
What Is a Rest Interval — and How Long Should You Rest?
The rest interval is the amount of time you take between sets. Like everything else in your program, it’s not arbitrary — it’s directly tied to your training goal.
Short Rest Periods (30–90 seconds)
Short rests work well in two scenarios. First, when you’re alternating between two completely different muscle groups — for example, pairing a chest exercise with a back exercise. Since the muscles aren’t competing for recovery, you don’t need much time between them. Second, when your goal is muscular endurance or cardiovascular conditioning, shorter rests keep your heart rate elevated and train your body to perform under fatigue.
Long Rest Periods (2–5 minutes)
If you’re training for maximum strength, longer rest periods are essential. Lifting heavy loads taxes your central nervous system and depletes the immediate energy stores in your muscles (phosphocreatine). Taking 3 to 5 minutes between sets allows those systems to recover fully, so you can perform at or near your maximum for every set — not just the first one.
Cutting rest short when training for strength is one of the most common mistakes lifters make. It feels more productive, but it compromises the quality of each set.
What Is Intensity — and Do You Need to Track It?
Intensity in a training program refers to how hard you’re working relative to your maximum effort. Not every program will specify intensity explicitly — it depends on how detailed your programming is.
Intensity for Beginners
If you’re new to training and still building consistency, intensity may not be something your program addresses at all. At this stage, showing up and moving well matters more than how close you are to your max effort on any given lift.
Intensity for Intermediate and Advanced Lifters
For those training 4 to 5 days a week with a structured program, intensity becomes an important tool for managing fatigue and recovery. You might see days programmed at 90–100% intensity for your primary lifts, with accessory work dialed back to 70–80%. On recovery days, intensity might drop to 50–60% — still moving, still training, but giving your body a chance to absorb the work from harder sessions.
A related concept worth understanding is Time Under Tension (TUT) — a way of manipulating intensity by controlling the speed of each rep rather than just the weight on the bar.
How These Four Variables Work Together
Reps, sets, rest, and intensity don’t operate in isolation — they’re designed to work as a system. A program built for strength will have low reps, multiple heavy sets, long rest periods, and high intensity on key lifts. A program built for endurance will look completely different: higher reps, moderate sets, short rests, and sustained effort at a manageable intensity.
Understanding what each variable is doing in your program means you can train smarter, ask better questions, and make adjustments when something isn’t working — rather than just grinding through a plan you don’t fully understand.
In the next episode of Foundations of Strength Training, we’ll continue building on these concepts as we get into how programs are actually structured week to week.
Most people are leaving some of the biggest health, performance, and longevity benefits available on the table—and they don’t even realize it.
If you think strength training is only for bodybuilders, athletes, or people trying to build massive muscles, you’re making a mistake that could cost you years of physical capability, athletic potential, and long-term health.
The reality is that strength training isn’t just for a select group of fitness enthusiasts. It’s one of the most powerful tools we have for preventing injury, protecting bone health, maintaining independence as we age, and improving performance in everyday life. Yet millions of people who would benefit the most never step into the weight room because they’ve been told it’s not for them.
Let’s dive in and discuss the three groups that stand to gain the most from strength training—and why waiting to start could mean missing a critical opportunity to improve your health, performance, and quality of life.
Strength Training for Young Athletes
If you’re a pre-teen or young adult training for a sport — whether that’s soccer, football, basketball, or anything else — lifting weights isn’t just allowed. It’s one of the most effective things you can do to elevate your game.
Strength training improves your ability to move and change directions quickly, making you more agile on the field or court. It builds the explosive power needed to box out an opponent, drive through a defender, or outrun the competition. In short, it directly translates to athletic performance in ways that sport-specific practice alone can’t fully deliver.
“Strength training plays a fundamental role in your ability as an athlete to perform.”
Youth strength training, when done with proper programming and supervision, is safe and highly effective. The concern that it will stunt growth or cause injury is a persistent myth — the research consistently shows the opposite when technique is prioritized.
Strength Training for Women
One of the most common concerns women have about lifting weights is getting too bulky. It’s worth addressing directly: for most women, building significant muscle mass requires years of very specific, high-volume training and a significant caloric surplus. A well-structured resistance program will not make you bulky — it will make you stronger, leaner, and more capable.
But beyond aesthetics, there’s a more important reason why strength training for women is especially valuable: bone health.
The Bone Mineral Density Window
Osteoporosis — the gradual thinning and weakening of bones — disproportionately affects women, particularly after menopause. What many people don’t realize is that the window for building bone mineral density largely closes around age 30 to 40. After that point, you’re largely maintaining what you’ve already built.
Women who give birth and breastfeed also lose a significant amount of bone mineral density during that period. The body prioritizes the infant’s needs, drawing calcium and minerals from the mother’s bones. This makes the years before 30 to 40 especially critical — the more bone density you can build now, the more cushion you have against the loss that comes later.
Lifting weights doesn’t just build muscle — it places mechanical stress on bones, which signals the body to increase bone density. This is one of the primary reasons resistance training can help reverse osteoporosis and is often recommended by physicians for women at risk.
For older adults, strength training may be the single most impactful lifestyle intervention available. The concerns that bring most people to this topic — knee pain, joint pain, difficulty moving, loss of independence — are precisely the things that a well-designed resistance program addresses.
As we age, we naturally lose muscle mass (a process called sarcopenia) and bone density. This contributes to slower movement, reduced balance, and a higher risk of falls and fractures — one of the leading causes of hospitalization in adults over 65. Strength training directly counters this process.
With consistent training, older adults can:
Reduce chronic knee and joint pain
Improve balance and coordination
Maintain or restore the ability to move without assistance
Support healthy metabolic function
Sustain quality of life well into their 70s, 80s, and 90s
“Strength training is the answer for many looking to age gracefully — to move well, reduce pain, and continue to have long, healthy, quality years of life.”
The key for elderly individuals is working with a program designed specifically for their current fitness level, with appropriate load, rest, and movement selection. The goal isn’t maximum performance — it’s sustainable progress and long-term health.
Finding Your Niche in the Gym
Strength training isn’t one-size-fits-all. The right program for a 16-year-old soccer player looks very different from the right program for a 60-year-old looking to reduce joint pain — and both look different from what a 30-year-old woman should be doing to build bone density.
This is exactly what the Foundations of Strength Training series is designed to address. Over the coming episodes, we’ll break down everything you need to understand to train with intention — from the structure of a program to how to measure progress and adjust over time.