If you’ve ever searched for a workout program online, you already know how overwhelming the options are. Full body. Upper/lower. Push/pull/legs. Bro splits. Six-day programs. Three-day programs. Every one of them claims to be the most effective approach, and every fitness influencer seems to have a different opinion on which one is best.
Here’s the reality: there is no universally best training split. The right split is the one that fits your schedule, your recovery capacity, your training history, and your lifestyle — and then gets executed consistently. A world-class program you can’t stick to is worth less than a simple program you follow every week without fail.
What this guide will do is walk you through the main training splits available, explain what each is built for, and give you a clear framework for choosing the one that will actually work for you.
What Is a Training Split?
A training split is simply a plan for how you divide your training across the days of the week. It determines which muscle groups you train on which days, how many days per week you’re in the gym, and how much recovery time sits between sessions for any given muscle.
The choice of split has real consequences. A split that asks too much of you — given your schedule or recovery ability — leads to chronic fatigue, degraded performance, and eventually burnout or injury. A split that asks too little means muscles aren’t being stimulated frequently enough to adapt and grow. The goal is to find the middle ground: enough stimulus, enough recovery, and enough consistency that your body can keep making progress.
The Main Types of Training Splits
Before getting into how to choose, it helps to understand what each split actually looks like in practice.
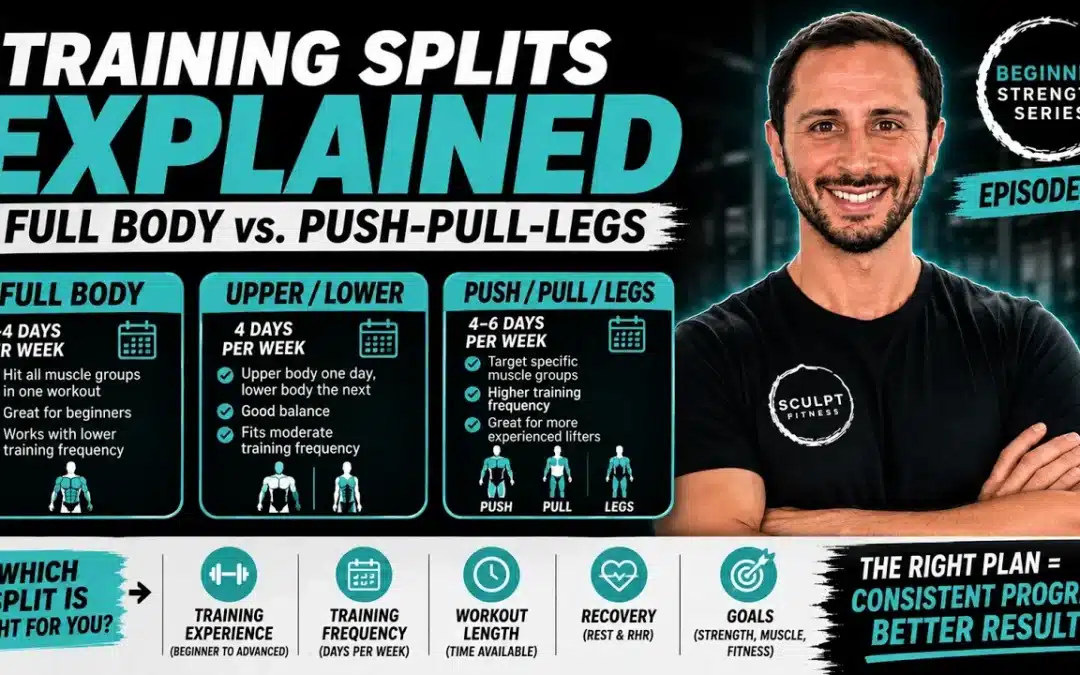
Full Body Split
In a full body split, every training session targets all major muscle groups. A typical full body workout might include a squat pattern, a hip hinge, a push, a pull, and a carry or core movement — covering the 5 foundational movement patterns in a single session.
Full body splits are usually run 2–4 days per week, with rest days between sessions to allow recovery. Because you’re distributing work across the entire body in each session, no individual muscle group gets pushed to absolute failure — which means recovery is faster, making this format ideal for lower training frequencies.
Upper/Lower Split
An upper/lower split divides training into upper body days (chest, back, shoulders, arms) and lower body days (quads, hamstrings, glutes, calves). This allows a bit more focused work on each region than a full body split, while still hitting every muscle group twice per week in a typical 4-day structure.
Upper/lower is a natural stepping stone between full body training and more segmented approaches. It offers more volume and specificity than full body while remaining manageable for intermediate lifters who can handle more intensity per session.
Push/Pull/Legs (PPL)
Push/pull/legs is a more segmented split that organizes training around movement patterns rather than body regions:
Push days — chest, shoulders, triceps (all muscles involved in pushing movements)
Pull days — back, biceps, rear delts (all muscles involved in pulling movements)
Leg days — quads, hamstrings, glutes, calves
A standard PPL cycle runs across six days (two full rotations) or three days (one rotation per week). Because each muscle group gets an entire session devoted to it, PPL allows for significantly higher volume per muscle group per session — but that volume demands more recovery time before the same muscles are trained again.
Body Part / “Bro” Splits
The most segmented option is dedicating an entire session to a single muscle group — back and biceps one day, chest and triceps the next, legs, shoulders, and so on. This approach allows maximum volume per muscle group per session and is primarily used by advanced bodybuilders or individuals training five to six days per week with a long training history and high recovery capacity.
For most people — especially beginners and those training four or fewer days per week — this level of segmentation means each muscle group gets worked only once a week, which research consistently shows is suboptimal for strength and muscle development.
How to Choose the Right Split for You
The right split for you comes down to four factors. Work through each one honestly and the answer becomes clear.
Factor 1: Your Training Experience
If you’re new to strength training, start with a full body split. This isn’t a consolation prize — it’s the most effective format for where you are.
Here’s why: when you first begin lifting, your neuromuscular system has a significant amount of adapting to do. Your body needs to learn how to recruit muscles efficiently, coordinate movement patterns, and build the neural pathways that underpin strength. You’ll make your fastest early gains not from destroying individual muscles but from frequently practicing the key movement patterns with increasing competence.
Training each movement two to three times per week — as a full body split allows — accelerates that learning process. It also means that even if Monday’s session isn’t your best, you’ll have another opportunity to hit those same patterns by Thursday. Frequency is a powerful teacher in the early stages.
Beyond the neurological argument, beginners simply can’t generate enough intensity to fully exhaust a single muscle group the way an experienced lifter can. A beginner attempting a pure leg day would run out of technique and systemic fatigue long before they’d maximally stimulated the quads, hamstrings, and glutes. Full body splits are built for the volume and intensity level you’re actually operating at. For a complete guide on building your first program, How to Structure a Beginner Strength Training Program walks through the entire process.
As you develop more training experience — typically after six to twelve months of consistent training — you’ll build the ability to hit individual muscle groups with the intensity that makes more segmented splits worthwhile.
Factor 2: Your Weekly Training Frequency
How many days per week can you realistically, consistently get to the gym? Be honest here — not aspirational, realistic.
2–3 days per week: Full body or upper/lower. At this frequency, you need every session to touch every major muscle group, because you won’t see each one enough times per week otherwise. A full body split ensures you’re hitting your muscles at least twice weekly even with a lighter schedule.
4 days per week: Upper/lower is the natural fit. You’ll train each half of the body twice per week with adequate rest between the matching sessions. This is one of the most well-researched and consistently effective split structures available.
5–6 days per week: Push/pull/legs or other segmented approaches become viable. At this frequency, you have enough days to give each muscle group focused work and still spread those sessions across the week with recovery time built in.
The key principle underlying all of this is muscle frequency — how often each muscle group gets trained per week. Research generally supports that training a muscle group two times per week produces better results than once per week, especially for those who aren’t advanced lifters. Your split should be designed to achieve that frequency given the number of days you’re available.
Factor 3: Your Session Length
How much time do you have per session? This matters more than most people think.
A genuine full body workout — warming up and working through all major movement patterns with appropriate sets and rest — takes time. If you’re consistently working with 60–90 minute sessions, full body and upper/lower splits work well. You have enough time to get through the necessary volume for each muscle group.
If your sessions are shorter — say, 30–45 minutes — a more segmented split can actually work better at higher frequencies. You can go in, focus intensely on a smaller set of muscle groups, finish, and leave. Thirty minutes of highly focused push training is more productive than thirty minutes of trying to squeeze a full body session into half the time and not doing any of it well.
The math works out: six 30-minute sessions of focused, segmented work produces a comparable or greater training stimulus than three 60-minute full body sessions — the total time invested is the same, but the per-muscle attention is higher in the first scenario. What matters is the quality of work each muscle group receives, not just whether you showed up.
Factor 4: Your Recovery Capacity
Recovery is the factor most people overlook, and it may be the most important one.
Training creates the stimulus for adaptation. Recovery is when that adaptation actually happens. If you’re not recovering adequately between sessions — whether that’s because of poor sleep, high stress, nutritional gaps, or simply insufficient rest days — you’re accumulating fatigue without fully realizing the gains.
If you find that you need two or more days of rest before a muscle group feels ready to be trained hard again, a more segmented split with built-in recovery time is your answer. Push/pull/legs with a day off between sessions gives each muscle group adequate time before it’s asked to perform again.
Conversely, if you recover quickly and feel ready to train after a single rest day, higher-frequency full body or upper/lower splits will keep you in the gym more consistently and accumulate more total volume over time. Understanding how rest and intensity interact across a training week is core to making this call well — Reps, Sets, Rest & Intensity: The 4 Components of Every Training Program covers that relationship in depth.
A Quick Decision Framework
Use these four factors together, not in isolation. Here’s a simple way to think through them:
Start with experience. If you’re a beginner, lean toward full body regardless of the other factors. If you’re intermediate or advanced, continue to the next factor.
Then check frequency. How many days per week will you realistically train? Two to three days points toward full body. Four days points toward upper/lower. Five or six opens the door to push/pull/legs.
Adjust for session length. Short sessions (under 45 minutes) + high frequency → consider more segmented. Longer sessions (60+ minutes) + moderate frequency → full body or upper/lower hold up well.
Validate with recovery. If you’re consistently sore or fatigued going into sessions, you’re outpacing your recovery. Either reduce frequency, reduce volume, or shift toward a split that gives each muscle group more rest between sessions.
No Split Is Better Than Consistency
There’s a temptation to keep searching for the optimal split — the one that will unlock faster results than everything else. It doesn’t exist. The research is fairly clear that when volume and intensity are matched, different splits produce similar outcomes. The variable that separates people who make progress from people who don’t isn’t the split they chose. It’s whether they executed it consistently over months.
A full body program run for six months with real effort and progressive overload applied every week will produce dramatically better results than a perfectly designed push/pull/legs program that gets abandoned after three weeks because the schedule doesn’t fit your life. Fit matters. Consistency matters. Execution matters.
Choose a split that matches where you actually are — your schedule, your recovery, your experience — and then commit to running it long enough to see what it can do. That means tracking your progress session to session, warming up properly every time, and applying progressive overload consistently across the weeks. The split is just the container. What you put into it is what determines the outcome.
What We Use at Sculpt Fitness
At Sculpt Fitness, the programs we design for our members — whether in Personal Training, Semi-Private Training, or the Online Program — are built around the individual’s actual schedule and starting point. Beginners almost universally start on full body or upper/lower structures because it matches where they are and builds the foundation they’ll need before more segmented training makes sense.
As members develop experience and capacity, the split can evolve with them. That’s the advantage of training with a coach rather than copying a generic plan: the program adapts to you rather than forcing you to adapt to it.
If you’re ready to start with a program that’s already matched to your level and built to progress correctly from day one, the Sculpt Fitness 8-Week Beginner Program is a great place to begin.
You’re putting in the time. You’re showing up consistently. You’re doing the work. And yet — the results don’t seem to match the effort. The scale isn’t moving. The weights aren’t climbing. You feel like you’re working hard but not actually going anywhere.
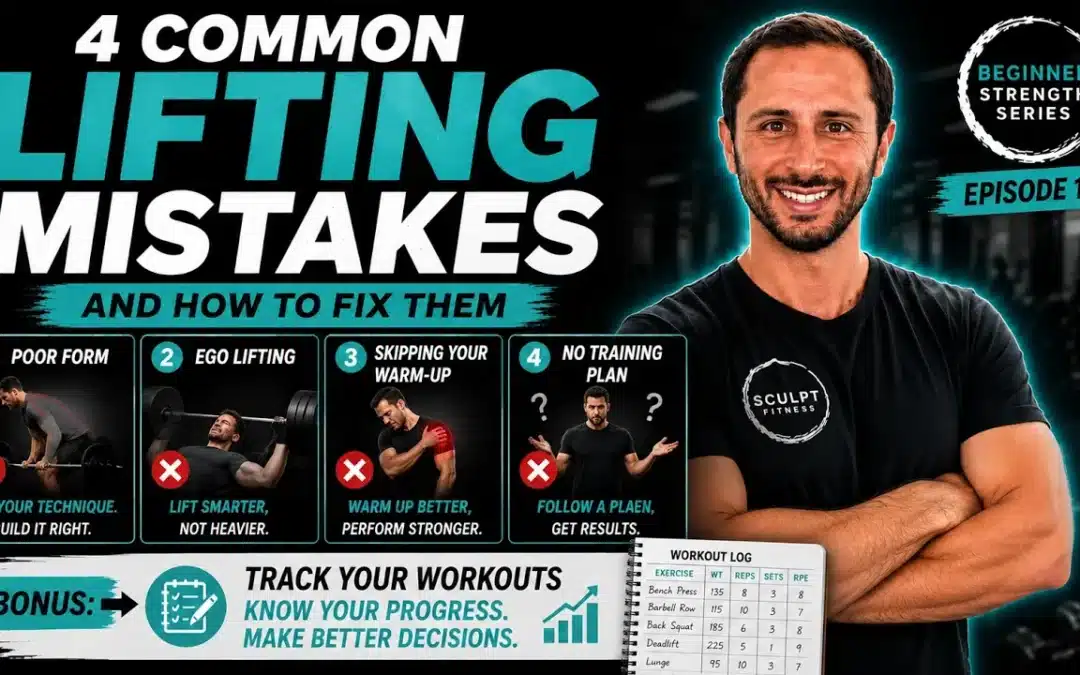
The frustrating truth is that most people stuck in this position aren’t failing because of a lack of effort. They’re failing because of a handful of very fixable mistakes that silently undermine everything they’re doing right. These aren’t exotic or complicated errors. They’re the same four mistakes that come up over and over again on the gym floor — and once you know what to look for, you’ll see them everywhere.
Here’s what they are, why they matter, and exactly how to correct each one.
Mistake #1: Poor Form (And What Form Actually Means)
Form is the most talked-about topic in strength training and also the most misunderstood. Most people think good form means keeping your back straight and not dropping the weight on yourself. That’s the baseline — the floor, not the ceiling.
True form, the kind that actually produces results, is about muscle recruitment. It’s about learning to correctly activate the specific muscles that are supposed to be the primary movers in each exercise, and building the mind-muscle connection that makes that happen reliably under load.
Here’s why this matters so much: when you perform an exercise with poor form, your body finds the path of least resistance. It recruits whatever muscles happen to be convenient — not necessarily the ones the exercise is designed to develop. If you’re squatting without properly engaging your glutes and hamstrings, your knees and lower back are likely picking up the slack. You might feel like you’re doing a lot of work, and you may even be fatigued when you’re done, but you’re not actually stimulating the muscles you came to train. You’re getting the fatigue without the adaptation.
This is exactly why technique comes before load — always. Before you worry about how much weight is on the bar, you need to know how to correctly recruit the muscles that should be working in that exercise. For a full breakdown of how this applies to the core movement patterns every lifter should master, see The 5 Foundational Strength Training Movements and How to Do Them Correctly.
Once you can execute an exercise with clean mechanics and feel the right muscles working, then — and only then — should you start progressively adding weight.
Mistake #2: Ego Lifting
Ego lifting is what happens when the pursuit of a bigger number on the bar overrides the commitment to doing the exercise correctly. It’s extremely common, it’s very easy to fall into, and it tends to get worse the longer someone has been training — not better.
Here’s how it typically unfolds: You’ve been working hard on your form. You’ve nailed the technique on your squat or your bench. Your weights have been climbing steadily, which feels great. And then, somewhere along the way, the weight becomes the point. You start adding load faster than your technique can absorb it. The form that took you weeks to build starts to quietly degrade. Your depth gets shallower. Your back starts rounding. Your range of motion narrows.
The insidious part is that it often doesn’t feel like a problem. You’re tired at the end of your sets, so it seems like you’re working hard. But what’s actually happening is that you’ve shifted the load off the target muscles and distributed it across whatever secondary structures are willing to take it — which means you’re no longer getting the stimulus you think you’re getting, and you’re accumulating a disproportionate amount of joint stress in the process.
The fix is simple in principle: the weight you choose should be determined by what you can lift with excellent form for your full target rep range — not by what you want to lift or what looks impressive. If you lose your form before you reach your rep target, the weight is too heavy. Strip some off and do the set correctly. Two sets with clean mechanics will always outperform three sets of ego lifting. For guidance on how to identify the right working weight for your level, How Much Weight Should You Lift? A Beginner’s Guide to Finding Your Starting Weight walks through exactly that process.
Mistake #3: Skipping Your Warm-Up
If you’re walking straight from the parking lot to the squat rack, you’re leaving results on the table before you’ve done a single rep. A warm-up isn’t a courtesy — it’s a physiological prerequisite for a productive training session.
Here’s what’s actually happening in your body when you warm up correctly:
Blood flow increases to the target muscles. Warm muscles receive more oxygen and nutrient delivery during exercise, which directly supports performance and recovery. Cold muscles are literally less metabolically prepared to do the work you’re about to ask of them.
Neuromuscular activation improves. Your nervous system is the bridge between your brain and your muscles. A targeted warm-up “turns on” the neural pathways that govern the muscle groups you’re about to train — meaning those muscles respond faster, contract more powerfully, and recruit more completely during your working sets. This is sometimes called neural priming, and it’s a significant contributor to performance.
Your peak output comes earlier in the session. When you skip your warm-up, you’re essentially using the first half of your workout as a warm-up by default — meaning you’re doing real sets before your body is ready to perform them. By the time you’re truly switched on, you’ve already burned through sets you could have maximized. A proper warm-up eliminates this dead zone, so your first working set is just as productive as your fifth.
A good warm-up is specific — it should target the muscles and movement patterns that appear in that day’s workout, not just be a generic five minutes on the treadmill. For a full guide on how to structure one effectively, see How to Build the Best Warm-Up Routine.
Mistake #4: Treating Workouts as Individual Sessions Instead of a Training Plan
This is the mistake that trips up the most people who are otherwise doing everything right. They’re showing up. They’re working hard. They’re not skipping warm-ups and they’re watching their form. But they’re treating each session as a standalone event rather than a chapter in a longer story — and that distinction matters enormously.
A workout is what you do on Tuesday. A training plan is what your Tuesday workout means in the context of your Monday last week, your Thursday next week, and your eight weeks from now. The difference is intentionality and progression.
When you operate session to session without a plan, you tend to repeat what you did last time — or do something slightly different based on how you feel. Neither creates the conditions for consistent strength development. What your body responds to is a systematic, progressive increase in demand over time. That’s what forces adaptation. That’s what makes you stronger.
This is the principle of progressive overload — and it’s non-negotiable. Without it, your body has no reason to adapt further. You’ll maintain what you have, but you won’t build beyond it. Your training will plateau, and no amount of hard work within a session will overcome the absence of a progression strategy across sessions.
A real training plan has direction. It knows what you did last week and asks a little more of you this week — whether that’s more weight, more reps, more sets, or less rest between sets. It also knows when to back off. Deload weeks — periods of intentional, reduced intensity — are a built-in feature of smart programming, not a sign of weakness. The goal is to pull back briefly so you can come back and push further. Structured recovery is what makes sustainable progress possible. For a deeper look at how to put progressive overload to work across a full program, How to Keep Getting Stronger: The Progressive Overload Method covers it in detail.
This is the habit that makes all four of the above fixes actually stick — and it’s the one most people still skip even after they’ve corrected everything else.
You can have perfect form, the right weights, a great warm-up, and a solid training plan — but if you’re not tracking what you do in each session, you’re still operating partially blind. How do you know when to add weight? How do you know if you’re actually progressing or just maintaining? How do you know whether your deload was enough before you push again?
Tracking gives you the data to answer all of those questions. As covered in Episode 9 — How to Track Your Lifts for Consistent Progress, the four things worth logging are: weight, reps, sets, and perceived effort. That’s it. Thirty seconds per exercise, either in a notebook or your phone’s notes app. And at Sculpt Fitness, our Semi-Private Training members have this built directly into their program — every session, every metric, tracked and visible to coaches so we can make smarter progression decisions together.
Without tracking, you’re guessing at your progress. With it, you’re managing it. The difference in results over six months is significant.
Fix the Mistakes, Then Stay Consistent
It’s worth saying clearly: correcting these four mistakes will feel different before it looks different. Your sessions will immediately become more productive — you’ll feel the right muscles working, your warm-up will make your early sets feel much better, and training with a plan will give each session a sense of direction it probably didn’t have before. But the physical results take time to catch up. That’s normal. That’s biology. Stay patient with the process.
What you can control right now is whether you’re making these mistakes or not. If you’ve recognized yourself in any of the four, that’s actually good news — because every one of them is fixable without changing anything about how hard you work. You just need to redirect that effort more precisely.
And if you’re ready to train with all of this built in from day one — proper technique coaching, a structured progressive plan, tracking, and the warm-up — the Sculpt Fitness 8-Week Beginner Program is designed to give you exactly that without having to figure it out on your own.
Most people walk into the gym with a plan — but they walk out without a record. They lifted something, they did some reps, it felt kind of hard. And next week, they’ll do it all again from scratch, guessing at the same weights they used last time, with no real way of knowing whether they’re actually moving forward or just spinning their wheels.
This is one of the most common and most preventable reasons people plateau. The fix isn’t a new program, a new supplement, or more time in the gym. It’s a two-minute habit that most lifters skip entirely: tracking your workouts.
Why Workout Tracking Is a Non-Negotiable Habit
Think about this honestly: if you can’t tell someone what you lifted last Tuesday, how many sets you did, and how hard it felt — how do you know you’re making progress?
The answer is: you don’t. And when you don’t know, you guess. And when you guess, you either undershoot and leave results on the table, or overshoot and risk injury. Neither outcome moves you forward.
Progressive overload — the principle of gradually increasing the demands placed on your muscles over time — is the engine behind every strength gain you’ll ever make. But progressive overload doesn’t work on guesswork. It requires data. You need to know what you did last session to intelligently decide what to do this session. Without that information, you’re not programming your training. You’re improvising it.
This point isn’t just coaching intuition. The value of systematic tracking shows up in research environments too. When training in a metabolic research lab at UCLA, it was striking to observe the lead physician — someone with as much scientific expertise as anyone in the building — walking into the gym with a small notebook and writing down everything he did. Every exercise, every weight, every set. Here was someone who understood the importance of data better than most, and he applied that same rigor to his own training. That image is a useful reminder that tracking isn’t a beginner crutch. It’s what serious people do.
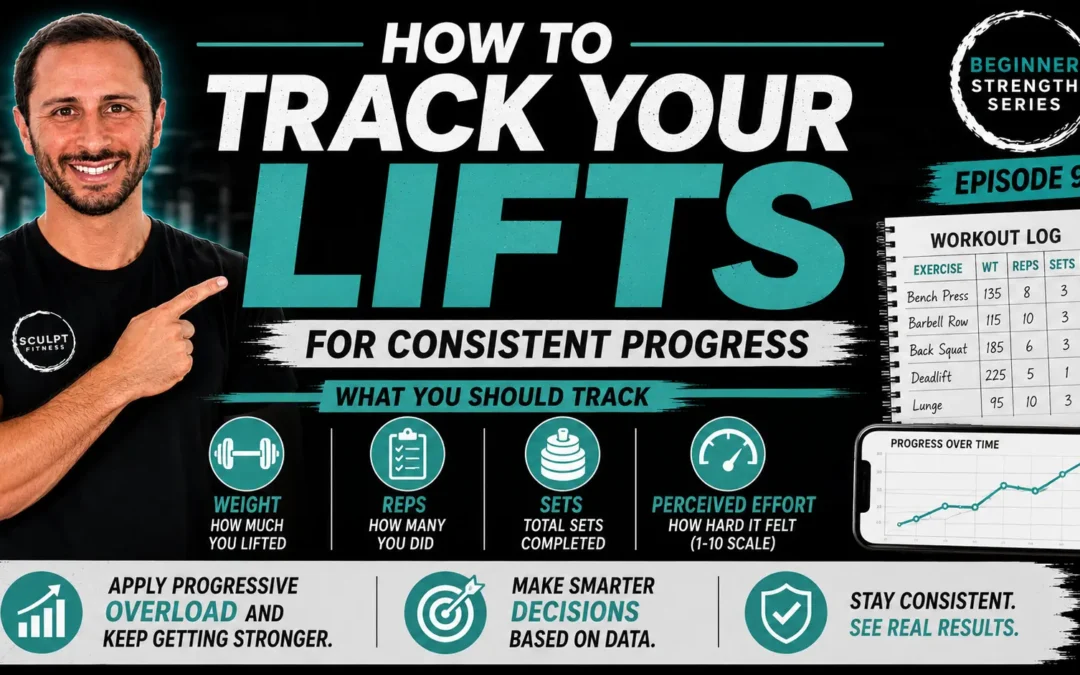
What You Should Actually Be Tracking
Workout tracking doesn’t need to be elaborate. You don’t need a specialized app or a color-coded spreadsheet. What you need is consistent data on four key metrics — the same four metrics that tell you everything you need to know about how your training is progressing.
1. Weight
The amount of weight you lifted on each exercise. This is the most obvious metric, and also the most important. If you don’t know what you lifted last time, you have no baseline for deciding whether it’s time to increase the load this time. The Two Rep Rule — the method for knowing exactly when you’re ready to add weight — only works if you actually have your previous rep numbers to compare against.
2. Reps
How many reps you completed for each set. Not how many you were supposed to do — how many you actually did. If your program calls for 3 sets of 10 and you’re hitting 12, that’s useful information. If you’re hitting 7, that’s also useful information. The gap between prescribed and actual reps tells you whether the weight is right, too heavy, or ready to be increased. For a full breakdown of how rep ranges tie to different training goals, see Reps, Sets, Rest & Intensity: The 4 Components of Every Training Program.
3. Sets
The total number of sets completed for each exercise. Volume — the aggregate amount of work you place on a muscle — is one of the primary drivers of strength and muscle development. Tracking your sets allows you to see whether you’re maintaining, increasing, or inadvertently decreasing your training volume over time. All three matter.
4. Perceived Effort
This one gets overlooked, and it shouldn’t. Perceived effort is a rating — typically on a scale of 1 to 10 — of how hard a given set or session felt. A 10 means you gave everything you had. A 5 means you had significant capacity left in the tank.
Why does this matter? Because the same weight can feel very different depending on how well you slept, how much you ate, how recovered your muscles are, and a dozen other factors. If you lifted 135 lbs for 10 reps and rated the effort a 6, that’s different information than lifting the same weight for the same reps and rating it a 9. In the first case, you almost certainly have room to progress. In the second, you might need another session or two at that weight before pushing further.
Perceived effort is also your early warning system. If your weights are staying the same but your effort ratings are creeping up week over week — the same lifts are starting to feel harder — that’s a signal your body may be accumulating fatigue and a deload may be approaching, as covered in How to Keep Getting Stronger: The Progressive Overload Method.
How Workout Tracking Works in Practice at Sculpt Fitness
At Sculpt Fitness, tracking is built directly into how we coach — particularly in our Semi-Private Training program. Every member has their program laid out with designated space to log their weights, reps, sets, and perceived effort for each session.
As coaches, that data changes how we work. Instead of walking into a session and estimating where someone is based on feel, we can look at their last three weeks of logged numbers and see exactly what trajectory they’re on — what they’ve done, how hard it felt, and where they’re positioned to go next. That information allows us to give more precise guidance: when to push for a weight increase, when to back off, when to adjust an exercise because something isn’t translating the way it should.
It also gives members something they often underestimate the value of: proof of their own progress. When you can look back six weeks and see that you’ve added weight to every major lift, that the perceived effort on your sets has come down even as the loads have gone up, and that you’re hitting rep targets that felt out of reach when you started — that’s motivating in a way that vague feelings of improvement never are.
Making Decisions Based on Data, Not Guesswork
The point of all this tracking is simple: it lets you replace guesswork with decisions.
Without a training log, every session starts with a series of questions you can’t answer accurately. What did I lift last time? Was I close to failure or did I have gas in the tank? Should I go heavier today or stay where I was? Without recorded data, you’re estimating the answers to all of these — and estimates accumulate error over time.
With a log, the answers are right in front of you. You can see that three weeks ago you rated a set a 9 and today the same weight feels like a 7. You know you’re ready to progress. Or you can see that you’ve missed your rep target two sessions in a row — the weight is still too heavy and you need another week before trying to move up. The decisions become clear because the information is clear.
This is especially powerful when combined with the 5 foundational movements that form the backbone of any good beginner program. When you’re building your squat, deadlift, bench press, row, and lunge numbers over months of consistent training, having a complete log of that progression is one of the most useful tools you’ll have — both for staying motivated and for making smart programming decisions as you advance.
How to Start Tracking (And Why the Tool Barely Matters)
The most important thing about workout tracking is consistency, not sophistication. You don’t need the perfect system. You need one that you’ll actually use every session.
The simplest version: open the notes app on your phone before your first set. Write the exercise, the weight, the reps, and a number from 1-10 for effort. That’s it. Thirty seconds per exercise, done.
If you prefer pen and paper, keep a small notebook in your gym bag — the same way a research lab director would. There’s nothing more reliable than a physical log that doesn’t require a phone battery or an internet connection.
As your training gets more structured, you may want a purpose-built app that lets you build templates, view historical data, and see trend lines over time. But that’s an upgrade you can make later. The habit of tracking comes first.
The one mistake to avoid: logging after the fact from memory. Weights and reps blur quickly, especially after a hard session. Log each exercise immediately after you complete it, while the numbers are fresh. A thirty-second pause between exercises is all it takes.
The Lifters Who Plateau and the Ones Who Don’t
Here’s the honest reality: the difference between a lifter who makes consistent progress over a year and one who stalls out after three months isn’t genetics, gym access, or even program quality. It’s almost always consistency in both the training itself and the habits that support it.
Tracking is one of those supporting habits — and it’s one of the highest-leverage ones available. When you combine it with a well-designed program that applies progressive overload and gives appropriate attention to rest and recovery, you have essentially everything you need to keep making progress session after session, month after month.
It doesn’t take much. A notepad. A notes app. Thirty seconds between sets. The commitment to actually look at what you recorded before you decide what to do next.
That habit — more than any particular exercise, any advanced technique, or any piece of equipment — is what separates the people who keep getting stronger from the people who keep wondering why they’re not.
If you’re ready to put this into action with a fully structured program that has tracking built in from day one, the Sculpt Fitness 8-Week Beginner Program is designed exactly for that.
Most people treat the warm-up as an afterthought — a few half-hearted stretches before jumping into their first working set. But a proper warm-up is one of the highest-leverage things you can do to get more out of every session and reduce your risk of injury over the long term.
The good news is it doesn’t have to be complicated. It just has to be done right.
The Warm-Up Mistake Almost Everyone Makes
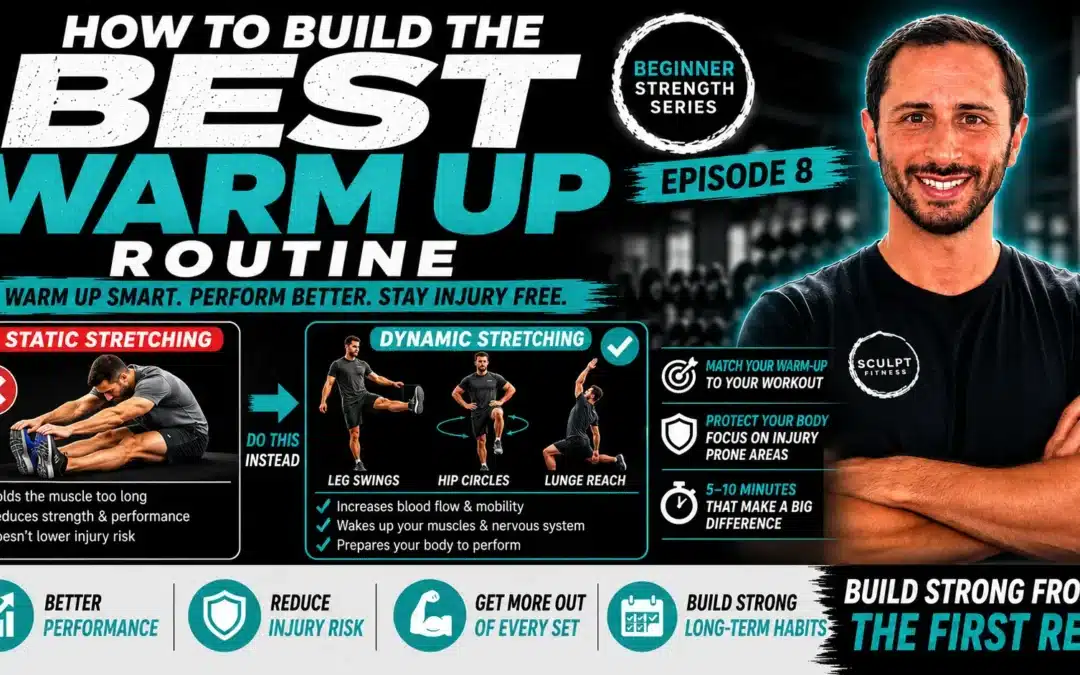
When most people think about warming up, the first thing that comes to mind is stretching. And when they think of stretching, they picture the classic hold-and-count variety — reaching for your toes and holding for 30 seconds, pulling your quad to your glute and holding, sitting in a deep hip stretch before a squat session.
This is called static stretching, and while it has its place, before a workout is not it.
Why Static Stretching Before a Workout Works Against You
Static stretching — holding a muscle in an elongated position for an extended period — does improve flexibility and range of motion over time. But when you do it immediately before training, it temporarily reduces the muscle’s ability to produce force. You’re essentially telling the muscle to relax and lengthen right before you need it to contract hard under load.
The result is reduced performance during your working sets and, contrary to popular belief, no meaningful reduction in injury risk. Static stretching before training is one of those gym habits that feels productive but actually works against you.
Save static stretching for after your workout, or on dedicated mobility days — not as part of your pre-training routine.
What You Should Be Doing Instead: Dynamic Stretching
Dynamic stretching is the warm-up tool that actually prepares your body for training. Unlike static stretching, dynamic stretching involves moving through your full range of motion continuously — not holding any single position.
Why Dynamic Stretching Works
When you move dynamically through a range of motion, several things happen simultaneously:
Blood flow increases to the working muscles, delivering oxygen and nutrients
Your core body temperature rises, making muscles more pliable and responsive
Your nervous system wakes up and begins recruiting the motor patterns you’re about to use
Joint fluid distributes more evenly through the joint, improving lubrication and reducing stiffness
The end result is a body that’s genuinely prepared to train — not one that’s been told to relax right before you ask it to perform.
Examples of dynamic warm-up movements include leg swings, hip circles, bodyweight squats, inchworms, arm circles, and walking lunges. The specific exercises you choose, however, should be driven by what your workout actually looks like.
How to Build a Warm-Up Specific to Your Workout
There’s no single universal warm-up routine that works perfectly for every session. The most effective warm-ups are tailored to the training you’re about to do — the movement patterns, the muscle groups, and the load.
Match Your Warm-Up to Your Workout
The guiding principle is simple: warm up the muscles you’re about to train, using movement patterns similar to the ones in your workout.
If you’re doing a lower body session — squats, deadlifts, lunges — your warm-up should focus on the quads, hamstrings, glutes, and hips. That might look like:
Bodyweight squats to prep the squat pattern
Hip hinges or reaching toe touches to warm up the posterior chain before deadlifts
Leg swings and hip circles to open up the hips and improve range of motion for lunges
You’re not just raising your heart rate — you’re rehearsing the movement patterns and waking up the specific muscles that are about to do the work. This is the same principle behind the five foundational movements — each movement pattern has a corresponding warm-up approach.
If you’re doing an upper body session, the same logic applies. Arm circles, band pull-aparts, light dumbbell presses, and scapular retractions all prepare the shoulders, chest, and back for the work ahead without fatiguing them before the session starts.
Warming Up Around Previous Injuries
If you have a history of injury, or a muscle that’s chronically tight or prone to aggravation, your warm-up needs to account for that. Spend additional time systematically working through the range of motion of that area before loading it.
This isn’t optional — it’s how you protect yourself from re-injury and ensure that the muscle can actually perform during the workout rather than guarding or compensating. A few extra minutes of targeted warm-up work on a problem area is a far better use of time than the weeks or months of missed training that come with a setback injury.
Putting It All Together
A well-built warm-up doesn’t need to be long — 5 to 10 minutes is typically enough for most sessions. What matters is that it’s intentional. Here’s the framework:
Skip the static stretching before training — save it for afterward
Use dynamic movements that take your joints through their full range of motion
Match your warm-up to your workout — train the patterns and muscles you’re about to load
Give extra attention to any areas with a history of tightness or injury
Applied consistently, this approach will improve your performance in every session and meaningfully reduce your injury risk over time — which is ultimately what allows you to train hard, stay consistent, and keep making progressive overload work in your favor week after week.
You’ve been showing up to the gym consistently. You’re doing the work. But somewhere along the way, the results slowed down — or stopped altogether. The scale isn’t moving, the weights aren’t going up, and your body looks and feels about the same as it did a few months ago.
If this sounds familiar, there’s a good chance the missing piece is progressive overload. It’s one of the most fundamental principles in strength training, and it’s the reason two people can follow a similar routine for a year and end up with completely different results.
What Is Progressive Overload?
Progressive overload is the practice of gradually making your workouts more difficult over time. The core idea is simple: your body adapts to whatever you consistently ask it to do. Once it has adapted, it stops changing — because there’s no new challenge to respond to.
Think of it like this. The first time you ran a mile, it was hard. After doing it regularly for a few weeks, it became manageable. Your body adapted. If you kept running the same mile at the same pace indefinitely, your fitness would plateau. The only way to keep improving is to keep raising the bar — running farther, faster, or with more elevation.
Strength training works exactly the same way. If you go to the gym and do the same exercises, with the same weight, for the same reps, week after week, your body will adapt to that stimulus and stop responding to it. Progressive overload is how you prevent that from happening.
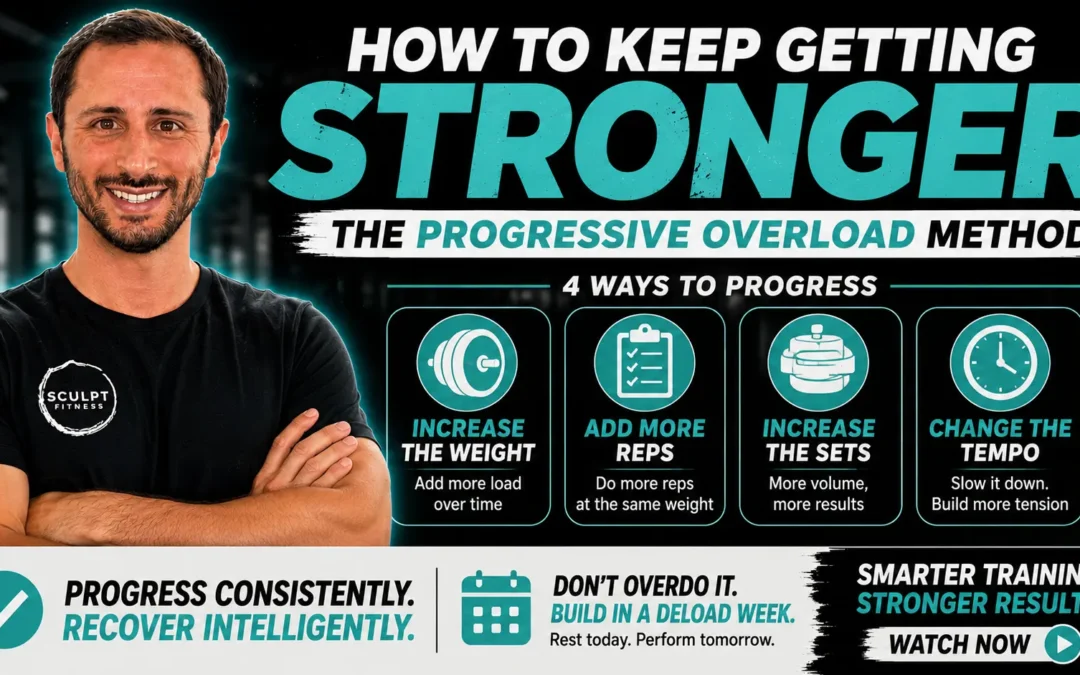
The 4 Ways to Apply Progressive Overload
There are four primary variables you can manipulate to progressively increase the difficulty of your training. You don’t need to change all of them at once — in fact, changing one at a time is usually the smarter approach.
Increase the Weight
The most straightforward form of progression. When the current weight becomes manageable — when you’re consistently hitting your rep target and recovering well — it’s time to add a small amount of weight. As covered in Episode 4, the Two Rep Rule is a reliable way to know exactly when you’re ready to make that jump.
Add More Reps
Before increasing weight, you can first try adding reps at your current load. If your program calls for 3 sets of 10 and you’re consistently hitting 12, that’s a signal your body has adapted and is ready for a new challenge — whether that’s more reps or heavier weight.
Increase the Number of Sets
Adding sets increases your total training volume — the total amount of mechanical work your muscles perform in a session. This is one of the primary drivers of muscle growth, and it’s why more experienced lifters typically perform more sets per exercise than beginners. As you progress through a program, gradually adding a set to key exercises is a sustainable way to increase the demand on your muscles without jumping to heavier weights before you’re ready.
Change the Tempo
Tempo refers to the speed at which you perform each phase of a rep — how fast you lower the weight, whether you pause at the bottom, and how fast you press or pull back up. Slowing down the lowering phase (the eccentric) dramatically increases the mechanical stress on the muscle without adding any additional weight. This is the principle behind Time Under Tension (TUT) — and it’s one of the most underused tools in beginner programming.
The Other Side of the Equation: The Deload Week
Here’s where a lot of motivated lifters go wrong. They understand progressive overload, they apply it consistently, and then they just keep pushing — more weight, more reps, more sets, week after week — without ever giving their body a planned opportunity to recover.
The result is usually one of two things: a performance plateau as accumulated fatigue masks their true fitness level, or an injury that sets them back weeks or months.
What Is a Deload Week?
A deload week is a planned period of reduced training volume and intensity — typically once every four to eight weeks depending on how hard you’ve been training. It’s not a week off. You still train, but you back off the load significantly, giving your joints, connective tissue, and nervous system a chance to recover from the accumulated stress of progressive training.
The counterintuitive truth about deload weeks is that they’re not a step backward — they’re part of what makes continued progress possible. Your body doesn’t actually get stronger during the workout. It gets stronger during recovery. A deload week is simply a more deliberate version of that same process.
How to Know When You Need One
Some programs schedule deload weeks automatically. If yours doesn’t, watch for these signs that your body is telling you it needs a break:
Performance is declining despite consistent effort
Persistent joint soreness or nagging pain that doesn’t resolve between sessions
Unusual fatigue or lack of motivation to train
Sleep quality declining despite no change in lifestyle
Any of these is a signal to pull back before your body forces you to.
Finding the Right Balance
Progressive overload isn’t about pushing as hard as possible as often as possible. It’s about finding the right balance between applying enough stress to force adaptation and allowing enough recovery to actually realize that adaptation.
The lifters who make the best long-term progress — the ones who are still training hard and injury-free years down the line — are the ones who master both sides of that equation. They push consistently, they progress methodically, and they protect their progress by taking recovery as seriously as the training itself.
That balance is exactly what a well-designed program is built to create. If you want a structured plan that applies these principles from day one, the Sculpt Fitness 8-week beginner program has progressive overload and recovery built directly into the programming — so you don’t have to figure it out on your own.
You’ve learned the foundational movements. You understand reps, sets, rest, and intensity. You know how to find your starting weight and when to progress. Now comes the question that ties it all together: how do you actually structure all of that into a program you follow week to week?
This is where a lot of beginners get stuck. The temptation is to pick a handful of exercises and repeat them every session — but that approach leaves a lot of results on the table and gets boring fast. A well-designed beginner program is built with more intention than that.
Why You Shouldn’t Do the Same Exercises Every Session
The five foundational movements — chest press, back row, squat, deadlift, and lunge — cover every major muscle group your body needs to develop. But that doesn’t mean you should perform the exact same variation of each movement every single day you train.
Repeating identical exercises every session isn’t just monotonous — it also limits your development. Each exercise variation hits a muscle group from a slightly different angle and emphasizes different portions of the muscle. By rotating through variations across the week, you get more complete muscle development, stay more engaged with your training, and build a broader movement vocabulary that prepares you for more advanced programming down the road.
How Program Variety Works in Practice
A good beginner program keeps the foundational movement patterns consistent while rotating the specific exercises used to train each pattern.
The Chest Press Example
Instead of performing a flat barbell bench press every training day, a well-structured program might look like this across the week:
Day 1 — Flat barbell bench press
Day 2 — Incline dumbbell press
Day 3 — Shoulder press
All three are pushing movements. All three develop the chest, shoulders, and triceps. But each one emphasizes a different portion of those muscle groups and challenges your body in a slightly different way. The result is a more balanced, well-rounded upper body — and a training experience that stays fresh enough to keep you coming back.
This same principle applies to every movement pattern in your program. Your squat variation might rotate between a barbell back squat, a goblet squat, and a split squat. Your row might cycle between a bent over barbell row, a dumbbell row, and a seated cable row. The pattern stays the same; the stimulus varies.
What a Well-Balanced Beginner Program Looks Like
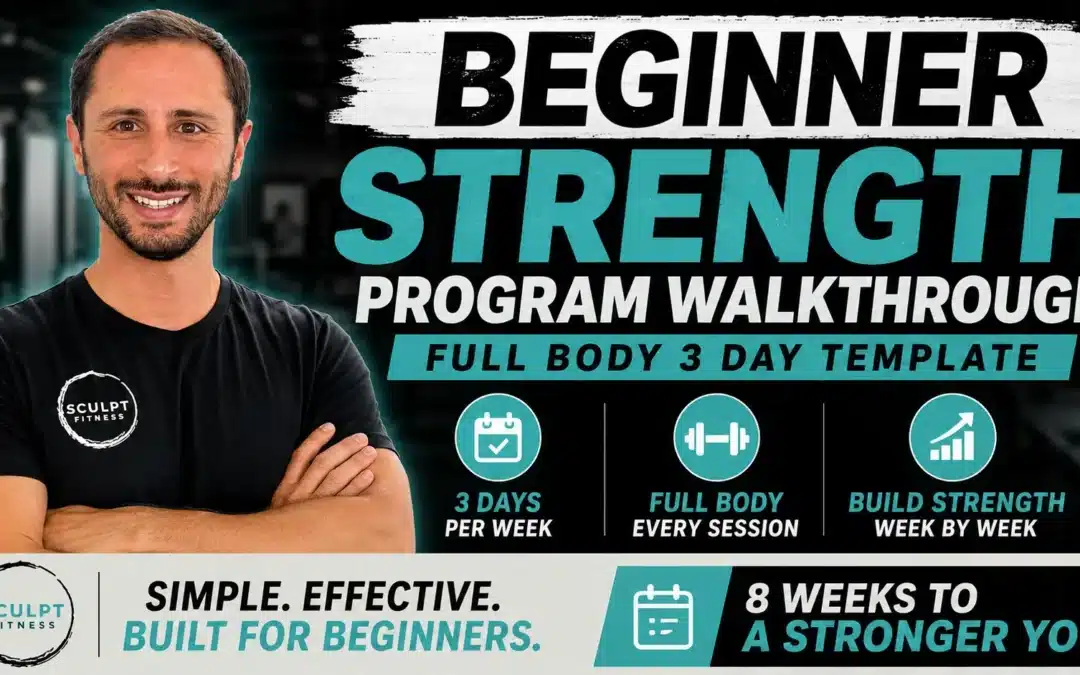
Beyond exercise variety, a good beginner program is designed to hit every major muscle group across the week without overloading any single session. This is typically achieved through a full body training structure — where each session trains the whole body at a manageable volume — repeated two to three times per week with rest days in between.
This approach works particularly well for beginners because the frequency keeps the movement patterns fresh while the rest days allow for the recovery that beginners need more of, as we covered in Episode 4 on finding your starting weight. The combination of variety and recovery is what allows you to build healthy, sustainable habits rather than burning out in the first month.
Understanding how reps, sets, rest, and intensity are programmed within each session is what makes the difference between a program that gets results and one that just keeps you busy. And as you progress through the weeks, the principle of progressive overload — gradually increasing the demand on your muscles over time — is what drives continued adaptation and growth.
The Sculpt Fitness 8-Week Beginner Program
If you’re new to the gym, don’t have specific injuries to work around, and are ready to build healthy habits from the ground up, the Sculpt Fitness 8-week beginner program is designed exactly for where you are right now.
It’s a low-cost program that puts everything covered in this series into a structured, ready-to-follow format. It includes built-in coaching feedback as you move through it — so you’re not just following a plan blindly, but getting guidance on how to progress your weights and adjust based on how your body is responding.
If you don’t know where to begin, this is the place to start.